Monday, August 31, 2009

Product Review: Danimals Crush Cups


Since the end of school last spring Kiddo has been begging me for Danimals Crush Cups. These are yogurt cups marketed to kids, whose primary selling point is the squeezable cup which allows you to eschew a spoon and make tremendously rude noises slurping your yogurt.

Naturally I said no.

Now, my no has real reasons behind it. First, I want my kids to understand that they can't have everything they see on television. Second, because of his ADHD Kiddo cannot have any Red Dye 40. That's a whole 'nother blog, but the short version is that there's a ton of anecdotal evidence that in kids with clinical hyperactivity (like Hyperactive-Impulsive ADHD) Red 40 aggravates the symptoms. The FDA isn't buying it, but in the UK and several European countries it's been banned for that reason. I know that when Kiddo was having truely horrible behavior problems in preschool he was having yogurt with Red 40 every day, and that his behavior issues lessened when we got the dye out of his diet.

Anyway, we don't have Red 40 in the house, anywhere. And I've found that it's especially prevalent in yogurt. It was quite challenging to find yogurt (which the kids think is desert, and may actually have two or three servings during the day) that had no artificial dyes and didn't cost a fortune. Trix yogurts are out. "Light"Yoplait is out, but most of the regular variety is okay. Store brands like Lucerne are pretty bad about it. Organic yogurt is always dye-free, but very expensive.

Hence my hesitation on buying a kid-marketed yogurt. One day in the store Kiddo, who has learned to spot Red 40 in the ingredient lists, picked up the Danimals Crush Cup package and said "Mom, I don't see the yukky red here, do you?"

I'll be darned. No artificial dyes or flavors. No corn syrup. Twice the calcium of some brands. 10% RDA of protein. And live cultures called "LLG" that they're particularly proud of. This is the nutrition info from Kiddo's favorite, Blueberry.

The price point isn't bad, about $2.99 a four-pack when it's not on sale, or 75 cents each. At Sam's Club I found a pack that worked out to about 50 cents a piece, which puts it at the same price as generic yogurt on sale.

And best of all, this morning I found a coupon rebate offer! Bulk store purchases like Sam's don't qualify, but since the Sam's pack doesn't have all the flavors the kids like that shouldn't be a problem. You must purchase the qualifying products by October 31, 2009 and mail it immediately (they must have it by November 16). The number of $1 coupons you receive will depend on how many products you purchase to qualify. Get your copy of the rebate form here: Dannonomics Rebate

Final Review: Nice to see a kid-marketed product that appeals to my over-protective mom-sense! Not only has a lot of thought gone into the healthiness of the product but they address hot parent concerns like artificial dyes and flavors. Kiddo thinks he's getting a great treat because he knows I usually say no to stuff on commercials (the commercials are annoying, but the product is so good I won't count it against them). And, as the final bonus... the spoons come home in his lunch box. Dannon's Danimals Crush Cups get my approval.

Sunday, August 30, 2009

Product Review: Betty Crocker Bake 'n Fill

My birthday was last week. I decided to make myself a fancy cake, since I make one for everyone else! What I wanted was a filled cake, so I pulled out my trusty Betty Crocker Bake 'n Fill cake pans. I originally saw these on an "As Seen on TV" type ad, and hubby gave them to me one year for Christmas. Like many folks I'm terribly skeptical about things can't at least hold in my hand before I buy, and ZAM co-worker Pikko suggested it'd make a good blog.

What this product claims is you'll be able to make fancy filled cakes quickly and easily. It comes with four pans to make two different shaped cakes (a dome cake and a more traditional layer cake shape) and a booklet of instructions and recipes.

If there's a trick to using this set successfuly, it's in following the instructions exactly. You must use shortening, not cooking spray, to grease the pans and fill them precisely. The only time I've had a bad cake was when I mis-measured making the cake batter and it overflowed the pan. I've made ice cream cakes and cakes filled with puddings or fruit. Ice cream cakes are probably the most time consuming, as you have to soften the ice cream just right and pack it in carefully.

For my birthday cake I used a devils food cake and sugar-free white chocolate Jell-o pudding (sugar free because I couldn't find it sugar-full!). I wanted something like the creme they put in creme-filled doughnuts, and this was awful close. In hindsight I bet my Safeway bakery ladies would have sold me four cups of filling.

I used the round dome cake pans and the pudding-filled cake guidelines in the pamphlet. I should note that the recipe calls for one box of pudding, and this took two. You make the pudding with a half-cup less milk like you do for pie, for a thicker set. I also used one chocolate pudding cup for a dollop of chocolate in the middle. If I had a little more time I would have made a chocolate ganache and poured it over the top of the cake for a chocolate overload!

With the inside so fancy I kept the outside plain. My camera ate most of my in-progress pictures and a lovely pic of the just-cut cake (I finally contacted Kodak to troubleshoot that, shouldn't be happening any more), so you'll have to settle for a "before" and some half-eaten shots.


Final review: It works as advertised and I get very nice results. You'll find your cakes a little more dense than you expect if you're using pudding cake mixes: this is in part because you have to refrigerate or freeze the cake and part because the pans restrict the rise for a firm cake that won't collapse from it's own weight. You will want to give yourself a little extra time to make the cake (maybe start a day ahead), for filling and chilling or freezing it before serving, and don't forget to make room in the fridge or freezer before you start. Overall two thumbs up and a product well worth buying if you like making fun cakes.

PS: Surfing around looking for links for the Bake 'n Fill set, I discovered Betty Crocker also makes a mini-cake version! Based on my experience with the big one, this is going on my list!

Sunday, August 16, 2009

Sweet Potato Pie

One of the commodities we've been getting in our TEFAP boxes is canned sweet potatoes. The problem is, my family doesn't like sweet potatoes one bit. Not as fries, mashed, candied, or with marshmallows on top. I firmly believe that if we're broke enough to be receiving TEFAP, we should not let any of it go to waste, so I set out to discover some way my family would eat them.

The answer was pretty obvious when I stumbled over it: pie.

There are lots of recipes for traditional sweet potato pie. As usual I'm looking for recipes that don't require I buy anything special. Pie crust ("short crust" to my friend Emily) is easy, I've always got that stuff and other basic baking needs. I found a lot of recipes that use sour cream or evaporated milk, which I don't keep around. The one I settled on uses buttermilk.

I keep buttermilk powder around when I can afford it, but you can make a buttermilk substitute by adding one tablespoon of vinegar to a scant cup of milk ("scant" means "not quite the whole measure" - just take a tablespoon of milk out before you add the vinegar.) This gives the properties of buttermilk for baking, and the taste is close. It will clump and look soured when you add the vinegar, which is what you want.

The recipes I found also use pie crust or graham cracker crust interchangeably. Graham cracker crust is really simple to make if you don't want to muck with rolling out dough. It's just crushed graham crackers and butter.

Graham Cracker Crust

6 Tbsp butter or margarine
About 24 graham crackers, crushed to make 1 1/2 cups of crumbs
1/4 cup sugar
Cinnamon, allspice, or nutmeg (optional)

Crush the graham crackers by putting them in sealable bag and rolling them until they're crumbs. A food processor or blender also works well.

In a small saucepan or the microwave, melt 6 tablespoons of butter. Measure 1 1/2 cups of graham cracker crumbs into a medium bowl. Add 1/4 cup of sugar to the graham crackers. Add the melted butter. Add a little cinnamon, nutmeg, or allspice to the crumbs for a spiced flavor. Stir or blend together with your hands. Press into the pie plate or other pan. To pre-bake the pie crust, bake for 8 to 10 minutes in a preheated 350 degree F. oven.

Most of the recipes I found used fresh baked and mashed sweet potatoes, and what I have are canned in syrup. They mash very well, and the syrup just means a sweeter pie. The recipe I started with is from bakingbites.com, and here's what I ended up with. If you're using buttermilk powder, follow the directions on the can for adding liquid and the powder:

Buttermilk Sweet Potato Pie

1 15 ounce can of sweet potatoes, drained
1 cup buttermilk
1/4 tsp nutmeg
1/4 tsp salt
2 tsp vanilla extract
3/4 cup brown sugar
3 large eggs
2 Tbsp flour
1 9 or 10 inch pre-baked pie crust

Preheat oven to 350 F.

In a blender or food processor, blend the sweet potatoes and buttermilk to a smooth puree. Add all ingredients except flour and blend smooth. Add flour and pulse the blender until it's just incorporated (don't over blend, it will make the pie tough).

Place the pie crust on a baking sheet and place baking sheet on the middle rack of a preheated oven. Pour filling into pie crust (it is thin enough that it will slosh if you put it in the pie crust and attempt to carry it over to the oven).

Bake for 50-55 minutes, until pie is set and jiggles only very slightly when the pan is bumped. You may want to put a crust guard (foil works) on the exposed pie crust to keep it from burning.

Cool on a wire rack to room temperature. Refrigerate for at least 2 hours, or overnight, before serving.

This is close enough to pumpkin pie that the kids don't notice the difference! A little whipped cream dresses it up.


For the pie pictured here I used a Wal-Mart "Great Value" pre-fab pie crust. I won't be buying that particular crust again. The first shrank up so bad on baking that what I had was a thick tart crust with barely any sides. So I rolled out the second crust a bit and left it laid over the edges of the pie pan for shrinkage, and it didn't shrink. It did, however, bubble up badly on baking (despite pricking it), which has left some shallow spots in the pie.

The good news is the kids don't care too much, they just like pie. And there's nothing wrong here that sufficient application of whipped cream won't fix.

UPDATE:
I made this pie today and remembered to take a picture of a pretty one. I've also tweaked the recipe a little.

The pie won't stay puffy, by the way. Custard pies will "fall" as they cool.

Friday, August 07, 2009

Random Recipes

I was poking around my web browser and ran across a bookmark folder called Cooking. I haven't peeked in here in a very long time! Since I always turn to the internet when I want new recipes or food information, I thought it'd be fun to explore what I have bookmarked.

Diabetic-lifestyle.com has a great page on reducing the sugar and fat in your baking. You sure don't have to be fighting blood sugar issues to use these tips! My biggest success was my Chocolate Zucchini Bread recipe, which I've taken from a sugary fatty recipe to one that I'll make for my kids regularly.

Oh goodness, here's the original link for my Very Best Rice Pudding Recipe at Foodgeeks.com! Haven't made that in a while. It makes a wonderful creamy rice pudding without resorting to a box pudding.

Doubble Crust Chicken Pot Pie at Cooks.com. This is a "cheater" recipe, because it uses prefab pie crust and cream of chicken soup, but it's awesome for "easy," "fast" and "tasty". I keep the link for cooking times.

Pretso's Recipe Page. Presto makes kitchen appliances, like deep fryers and pressure cookers. This link is handy when you're wanting to use your kitchen toys, I mean tools in a new way.

Baby Center's Recipe Page. I don't go here much any more, but if you need ideas for kids' lunches or kid friendly dinners. this is an awesome resource.

Grilled Potato Strips at Pilsbury.com. I'm not sure we've ever tried this recipe, but it looks awesome, so I'm keeping the bookmark. Hubby won't mind a new grill toy!

When I was making bread all the time I considered working with sourdough. Here's two pages about making your own starter: Mark Shepard's and Sourdough Home's.

My friend Ashbury's Eggplant Recipe Database. Ash is a vegan who always gives me great recipe ideas, and obviously has a fondness for eggplant!

The World's Healthiest Foods. I ran across this website looking up nutrition benefits, of what I don't recall any more. Whether you want food trivia, recipes, or want to change your eating habits, this is a great site.

Mr. Breakfast has awesome breakfast recipes, including this one for Whole Wheat Waffles. I was having a hard time with whole wheat waffles, they just weren't tasty. These came out great!

Peanutty Squares. This is from the "What to do with all this cereal" phase when we had three people on WIC. I approve of making "junky" snacks from cereal. It's at least full of whole grains and is fortified!

Scratch Coconut Cream Pie. I'm not sure I ever made this one. I love puddings and cream pies, ubt hate resorting to a box of pudding. This recipe from All Recipes got good reviews.

Beef Stew in Bisquit Cups. Do you subscribe to the Pilsbery news letter? You should! Sure, they want everything done with their brands, but it's chock full of good ideas. I'm saving this recipe for the next time I make stew.

What are some of your favorite recipe resources?

Wednesday, August 05, 2009

Zucchini!

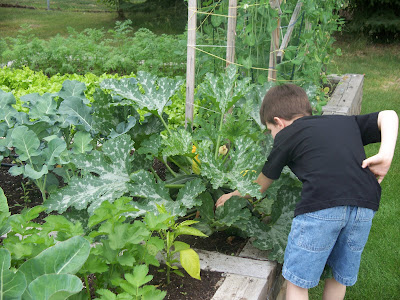
Our garden is producing like mad! We're starting to take bits home for daily use (and have been eating lettuce for a month) , but when the zucchinis were ready more drastic measures were called for. These are considered medium and medium-large for Alaskan gardens.


Yeah, gotta do something with those. That's a lot of zucchini bread!

Rather than try and make the boys eat zucchini for a week (they're not fond of it), I decided to freeze it. Frozen cubed zucchini works really well in anything cooked - spaghetti sauce, soups, stir fry, that kind of thing. So I started chopping. I did a little shredded too, but not a lot because blanching it shredded is a nasty mess.

Add far as food safety is concerned, you can't just toss zucchini in the freezer. The USDA has guidelines for food preservation, tested for bacteria and stuff. They no longer allow you to can zucchini or summer squash. According to my favorite canning site:
Recommendations for canning summer squashes, including zucchini, that appeared in former editions of USDA guides have been withdrawn due to uncertainty about the determination of processing times. Squashes are low-acid vegetables and require pressure canning for a known period of time that will destroy the bacteria that cause botulism. Documentation for the previous processing times cannot be found, and reports that are available do not support the old process.
Good enough for me, we freeze it (freezing takes less storage space, too). The USDA says to blanch it first. Blanching is just cooking the vegetable long enough to kill the bacteria. Too long and you get mushy veggies. not long enough, your food is unsafe. Be sure to use the USDA times and plunge the veggies immediately into icy water to stop the cooking.

They also say to leave a half-inch headspace in your freezer containers. Headspace is the space left at the top of a food preservation container. I finally thought to ask "why is the headspace measurement so important?", especially since I had to make sure it was right when I put my jam in the Fair.

Headspace, it says here, is necessary for the correct vacuum and sealing of your containers. Too little and the product can expand and the top won't seal. Too much and the air won't be driven out of the jar, leaving room for bacteria and discoloration. Since the Foodsaver sucks all the air out, that's not a problem here.

So I chopped and blanched and packed and marked and froze. The whole thing took me about an hour including getting everything set up. The results were 22 cups of chopped and shredded zucchini! I froze them in two cup packages, 'cause that's a nice size for most soups and such and coincidentally, the amount of shredded zucchini my zucchini bread recipes use. For shreds, be sure to measure before you blanch. When you thaw it to bake with it, just drain off any excess liquid before you use it and trust that was really two cups.


And this is just the beggining. We put only one zucchini plant in the garden, because the year we had three we had more zucchini than we could reasonably eat. This plant is far from done yet, there's a half-dozen more zucchinis growing, and more flowers!

Sunday, August 02, 2009

Product Review: Dryer Balls

I'm sure you've seen these. Dryer Balls (every time I say that Hubby snickers.) They come in a variety of brands, but are all the same basic idea: a "rubber" ball with nobbly protrusions. Toss them in the dryer with your wet clothes and they claim to cut down on drying time, eliminate static, reduce lint, soften your clothes, and make your towels fluffy.


It all sounds a little too good to be true, but I saw some at Fred Meyer for $5.99 and decided to cave and give them a try. I normally use dryer sheets (I always forget to put in liquid fabric softener). Kiddo has sensitive skin and fights excema, so I have to be cautious with laundry. Anything heavily scented is bad, but not softening the laundry leaves it too rough. I personally hate unsoftened towels and jeans, and it's so dry up here static is a big issue.

I swore I wasn't doing laundry on the weekends, but had enough for two medium sized loads after I sorted. So here we go, based on those two loads with the Dryer Balls and no fabric softener:

Drying Time: I'd have to do a bunch of loads and actually time them, but it does seem the clothes dried faster.

Static: Absolutely no static whatsoever, even on a load of cottons where I'd expect it.

Lint: The quantity of lint looks about the same to me, but again I'd have to try it with some normal-sized loads. The quality of the lint was different: I'd call it flufflier or lighter.

Softening: Yes! I made sure to wash towels and jeans, and neither have that sand-paper like unsoftened feeling. On the other hand, the clothes do not have that "slick" feeling you get from fabric softener. I do miss the little bit of scent you get even from unscented fabric softener. They still need the Kiddo's Sensitive Skin Test, but they feel soft enough to me.

Fluffy towels: Well, they aren't un-fluffy like they'd be if I line-dried them. Seems about as fluffy as with fabric softener. It did fluff up the beaten-down towel we use on the floor by the tub very nicely.

Overall Review: Works As Advertised. I'd like to do further testing to see if it really reduces drying time, because that'd be a huge bonus over never having to pay for fabric softener again. Overall, I'd recommend this product as a money saver that does what it says. Oh, and since they're reusable, they're good for the environment. Wonder how long they'll last?

Follow-Up Question: asked via Twitter, Beckanai wanted to know if the dryer balls get hot. They weren't any hotter than the laundry was. My dryer has a cool-down cycle at the end, though.

More Follow-Up:   Back when I published this in August 2009 someone asked how long the balls last.  They'd heard the balls tend to shatter dramatically.  I'm editing this almost exactly two years later and I'm still using the same dryer balls in the original picture above!
Related Posts with Thumbnails