Showing posts with label Recipe. Show all posts

Friday, January 20, 2012

Chocolate Cobbler

When it's cold out (and it's been around -30° F for the last little bit) I just want to bake. Warm yummy comfort food just seems like a great idea on a cold cold night!  This recipe I stumbled over on Facebook. It reminds me a lot of my Hot Fudge Pudding Cake, except with a sponge cake instead of a fudgy brownie-type cake. The original is over at justapinch.com.
Chocolate Cobbler

1 cup (two sticks) butter

The batter and chocolate
layers, waiting for the butter.
Batter Layer
1 1/4 c sugar
1 1/2 all-purpose flour
1 3/4 tsp baking soda
1/2 tsp salt
1 tsp vanilla
3/4 c milk

Chocolate Layer
1 c sugar
6 Tbsp cocoa powder
2 c boiling water

Preheat oven to 350° F. In a 9x13 glass baking dish, melt the  butter in the oven.

Meanwhile, sift or whisk together the dry batter layer ingredients in a medium bowl. Add the milk and vanilla and mix well. The batter will be stiff.  Once the butter is melted spoon the batter over the butter, but do not stir.

In a separate bowl mix the cocoa and remaining sugar together and sprinkle on top of batter. Do not stir.

Pour the 2 cups of boiling water on top of that (don't stir) and bake for 30-45 minutes. I bake mine until I have a nice golden brown crust. In my oven this usually take about 35 minutes. Serve warm. Great with ice cream or whipped cream.

I didn't have the self-rising flour the original calls for, so I punted using a guide on about.com and it came out great. The original also says to pour the batter over the butter, but it was way too thick for that so I used a spoon to help the pour along and distributed it as evenly as possible.

Yummy stuff, and very easy!  I've decided (after we all had some and I slept on it) that the cake is very sweet, and that when I make it again I'm going to cut the sugar in the batter in half.  I don't think it will suffer for it.


Sunday, January 15, 2012

Blueberry Muffins

It's -40 out.  The temperature dropped Friday and it's not getting much warmer than -30 for the next week or so.  We're all cooped up and it's just feeling chilly, so I turned to the kitchen.  I have blueberries in the freezer!

As you know I'm a huge fan of my 1975 edition Joy of Cooking, but to me their blueberry muffin recipe doesn't stand out like their banana bread recipe.  They use a basic muffin recipe and add stuff to it, and I've always found their base muffin kind of bland.  AllRecipes bailed me out with a nice blueberry muffin recipe.  Is it really to die for?  While I've yet to meet a muffin for which I'd commit murder these are really very good and will be made again.  Probably tomorrow.
To Die For Blueberry Muffins

1 1/2 cups all-purpose flour
3/4 cup white sugar
1/2 teaspoon salt
2 teaspoons baking powder
1/3 cup vegetable oil
1 egg
1/3 cup milk
1 cup fresh or frozen blueberries
1/2 cup white sugar
1/3 cup all-purpose flour
1/4 cup butter, cubed
1 1/2 teaspoons ground cinnamon

Preheat oven to 400 degrees F (200 degrees C). Grease muffin cups or line with muffin liners.

Combine 1 1/2 cups flour, 3/4 cup sugar, salt and baking powder. Place vegetable oil into a 1 cup measuring cup; add the egg and enough milk to fill the cup. Mix this with flour mixture. Fold in blueberries. Fill muffin cups right to the top, and sprinkle with crumb topping mixture.

To Make Crumb Topping: Mix together 1/2 cup sugar, 1/3 cup flour, 1/4 cup butter, and 1 1/2 teaspoons cinnamon. Mix with fork, and sprinkle over muffins before baking.

Bake for 20 to 25 minutes in the preheated oven, or until done.  Makes 8 servings.
I got ten muffins out of the batch - I filled the muffin cups to about 1/4" from the top to leave room for the crumb topping.  They rose up just lovely!  I used a pastry cutter to make the topping and I had twice as much as would fit on the muffins. I saved it for another batch. 

Kiddo also approved of the crumble topping.

Saturday, December 03, 2011

Biscuits

I love biscuits!  We had a cold snap recently and delicious southern-style biscuits hot from the oven were just what I needed to keep the chill off. They're easy, economical, and use ingredients I always have on hand.  For my non-American friends, these are a light flaky non-yeast bread that is probably closest to a scone.

I used to use Bisquick, but I've since discovered that I like scratch biscuits better.  Here's the very best biscuit recipe I've found, from La Belle Cuisine.  The author notes that lard, which is rendered animal fat, makes a crisper biscuit than vegetable shortening.  I don't keep lard around and these are pretty crisp with Crisco; one day I'll try them with lard.

If you do not keep buttermilk or buttermilk solids around you can use 1 tablespoon of vinegar or lemon juice in enough milk to make one cup total (remember the acid will flavor the milk, so white vinegar is best).  Let it stand five minutes so the milk sours properly.
Southern Biscuits
2 cups all-purpose flour, plus more as needed
1/4 teaspoon baking soda
1 tablespoon baking powder
1 teaspoon salt
6 tablespoons lard or solid vegetable shortening
3/4 cup buttermilk
Makes 25 to 30 biscuits

Sift the dry ingredients into a roomy bowl. Cut in the shortening with a pastry blender or fork until the mixture has the texture of coarse corn meal. Add the buttermilk and mix with your hand, lightly but thoroughly. Add a little more flour if the dough is too sticky. Knead for 1 minute. Wrap in wax paper or foil and refrigerate until well chilled, at least 20 minutes.

Preheat the oven to 450 degrees F.  Roll the dough out 1/2 inch thick on a lightly floured surface or pastry cloth. (Always roll from the center out for tender, crisp biscuits.) Cut the dough into the desired size biscuits.
Place the biscuits on a dark baking sheet and bake until golden brown, 10 to 12 minutes.
I used a 3-inch biscuit cutter and got 12 biscuits.  I don't have a dark baking sheet; the difference is whether the pan absorbs or reflects heat, but mine came out fine. Serve them warm with butter or jam; smother them in country gravy for breakfast; or use them instead of bread in your sandwich!


Sunday, November 20, 2011

Stuffed Green Peppers


Stuffed green peppers are Midwestern comfort food. Hubby remembers his step-mom Mary's with great fondness.  My mom (also a Mary!) used to make them, and I remember protesting at the peppers but ultimately enjoying them. The basic formula is green bell peppers stuffed with a rice, hamburger, and tomato sauce mix.  Since I haven't tried to make them since the early 90's I'm working from Mary Lanam's recipe and one from Allrecipes.  That, and I'm punting with the potential ingredients we have in the house.

Here's Mary's recipe:

Here's what I ended up doing:
Stuffed Peppers
6 large green bell peppers
1 pound ground beef
1 pound ground turkey
1/4 cup chopped onion
1 cup rice
1 can Hunt's Onion and Roasted Garlic Spaghetti Sauce
1/2 cup mozzarella cheese

Cook the rice according to package directions.  Brown the meats together with the onion and drain off the fat.

Cut the tops off the peppers (save the tops!) and clean out the seeds and membranes. Make sure the peppers will stand up in whatever pan you use, even if you have to shave a little off the bottom.

Mix together the meats, rice, and half the spaghetti sauce. Stuff the peppers.  Top with the remaining sauce and replace the pepper tops.  Put them in a shallow baking dish (I used bread pans).  Bake at 400° for 45 minutes.  Remove the pepper top lids and sprinkle mozzarella cheese on the peppers.  Bake an additional 10 minutes.

So here's a couple of things that might come up when discussing making stuffed peppers, and what I learned:

Do you blanche the peppers before stuffing?  Some recipes say to; Mom says if you do so the peppers are less likely to be bitter, but they are harder to stuff.  If you want to pre-cook them Mom recommends the microwave.

Do you cook the stuffing before stuffing or not?  Many older recipes have you stuff the peppers with uncooked meat and rice and cook it twice as long; I cooked up the stuffing before hand and thought it was fine, and I didn't have to worry about raw meat hitting a safe temperature.

Do you baste the peppers?  Some recipes say to baste the peppers with more sauce every 15 minutes to keep the peppers from drying out.  Here's where Mary's tip to save and use the pepper "lids" comes in.  Our peppers were so juicy one squirted Jack in the eye, and the stuffing was not dry at all.  You don't need to add water to the pan to steam the peppers for the same reason.


Sunday, October 16, 2011

Creamed Beef on Toast

Creamed beef on toast has a variety of names, the most common of which is probably S.O.S., or Stuff on a Shingle. The classic mess hall recipe used canned chipped beef.  I've never seen chipped beef anywhere, but it turns out you can use just about any beef ground or chopped small in this recipe.  I've been using BEEF.


This stuff is cooked crumbled beef in fat and juices.  I heat it up in a sauce pan and pour off all the drippings before I use it and it looks just like ground beef.  Creamed beef is easy: you're just serving beef in a white sauce. An overwhelming number of people insist this must be served with peas, which works for me (although not for Junior, for whome the only vegetable is corn).  It definately qualifies as yummy, not-diet comfort food!   I got this recipe from Food.com.

Creamed Beef on Toast
 
1 lb ground beef or 1 lb ground chuck
1/2 cup butter
2 cups whole milk
1/2 cup all-purpose flour
salt and pepper
1/2 loaf bread, for making toast 


Brown ground beef in a medium sized skillet. Drain off fat.

In a medium sized sauce pan or pot melt the stick of butter. Add the flour and cook over medium/medium-low heat to make a thick paste or rue. Keep stirring till it is a smooth consistency. Takes just a few minutes or so.

Add the milk and stir till thickens to the consistency of cooked pudding. When this mixture cools down it thickens even more, so don't overcook or it will be too thick!

Add in the ground beef and stir till incorporated well.

Toast your bread. Serve with ground beef mixture on top of the toast. Salt and pepper to taste. 
You could also serve creamed beef over rice or egg noodles, and I'm thinking about putting it in bread bowls.


Saturday, September 10, 2011

Ridiculously Easy Fruit Desert Pizza

Desert pizza is really a re-imagining of a tart.  There's a variety of ways to make them, premise being a crust covered in desertish things. This versatile version is best served cold (or room temperature) because of the cream cheese sauce.  Once the crust is baked and the cream cheese softened this takes maybe five minutes to throw together for awesome results.
Fruit Desert Pizza
1 pie crust, uncooked
1 8oz package cream cheese
1/2 cup sugar
1 tsp vanilla extract
Fruit

Soften cream cheese.  You can use any variety of cream or Neufchatel cheese as long as it's block, not whipped.

Roll out the pie crust onto a pizza pan and bake according to recipe (or box) instructions for unfilled crust.  Let cool completely. 

Meanwhile, cream together the cream cheese, sugar, and vanilla.  When crust is completely cooled spread with cream cheese mixture.  Arrange fruit on top of cheese.  I used blue berries, but as you can imagine about any fruit will do.  Try sliced strawberries and kiwi, just about any berry, canned Mandarin oranges, canned peaches or pineapple rings.

Garnish with a dusting of powdered sugar or whipped cream, if desired.  Be careful cutting, as a cold pie crust can be brittle.  Enjoy!

Wednesday, November 25, 2009

Hurray for the Pumpkin Pie

Thanksgiving is tomorrow, and I am thankful that we've the makings for a feast that will keep me cooking for two days!

Honestly, I cheat a lot due to a very small kitchen. I use instant mashed potatoes, Stove Top Stuffing, and other things that help me get it all on the table at the same time while it's still hot. A lot of my Thanksgiving cooking happens in that 30 minutes when the turkey is resting before carving. But one thing that cannot be done right ahead of dinner is pumpkin pie.

Pumpkin pie is a custard, which means it cannot be eaten hot. You need to give it a couple of hours to cool or chill it in the fridge. So the day before Thanksgiving I make pie. A couple of years ago I blogged pumpkin pie from scratch, but this year let's look at the pumpkin pie recipe as defined in the U.S.: The Libby's Pumpkin Pie Recipe. This recipe has been on the back of the Libby's pumpkin can since the 1950's, and in some ways has defined how we eat the vegetable.

Libby's Famous Pumpkin Pie
MIX sugar, cinnamon, salt, ginger and cloves in small bowl. Beat eggs in large bowl. Stir in pumpkin and sugar-spice mixture. Gradually stir in evaporated milk.

POUR into pie shell.

BAKE in preheated 425° F oven for 15 minutes. Reduce temperature to 350° F; bake for 40 to 50 minutes or until knife inserted near center comes out clean. Cool on wire rack for 2 hours. Serve immediately or refrigerate. Top with whipped cream before serving.

Of course you can adapt this; it's pretty forgiving if you keep the basic ratios consistant. Use pumpkin pie spice instead of the cloves, ginger, and cinnamon if that's what you have. Heavy cream will stand in for evaporated milk. One 12 ounce can of pumpkin happens to be 2 cups: any winter squash would work (except maybe spaghetti squash) if you wanted to bake it and pulp it. I find myself wondering if the basic recipe would work for sweet potato pie.

If there's a trick to pumpkin pie, it's to make sure the filling is very well blended, which is why the recipe has you beat the eggs separately and stir the rest into them. Use a scraper to be sure there's no pumpkin trying to evade you on the bottom of the bowl. The first picture is the filling all ready to go (it doesn't look orange because the bowl is reflecting the flash and washing it out).

With custard pies I recommend putting the pie pan with the prepared crust on a baking sheet on the oven rack and then pouring the filling in. Carefully put the rack in and close the oven door gently. I've slopped filling over the edges getting the pie in the oven, and the filling will scorch and burn on the crust, spoiling the taste. The second picture is the filling in the prepared crust just before I put it in the oven.


Tuesday, November 03, 2009

Penny Pinching: Fluff Coffee

The Twitterverse is on fire with Starbucks holiday coffees. I have been just dying for a Gingerbread Latte, but we're in penny pinching mode to make a nice Christmas and a $4 coffee just isn't in my foreseeable future.

Fortunately you can fake a latte. Ideally you should have an espresso machine with a steamer and some really good espresso roast coffee. I've faked it with a little french press I got at the recycle pad and a milk frother my sister gave me. But let's do it with nothing but this can of MJB I've got sitting here and the stove.

Making "Espresso"
In your regular drip coffee maker, use 1/4 cup coffee grounds and 1/2 cup water. This makes 2 - 4 ounces of coffee concentrate, about two shots. Be warned this also concentrates the caffeine (oh darn!).

"Steaming" Milk
Some food safety warnings here: between 41F and 135F milk is considered unsafe. It's really easy for bacteria to grow in it. You'll want to heat your milk to at least 140F. On the other end of the thermometer, the scalding point of milk is 180F. You don't want to scald it, it changes the taste. My sister, a coffee shop manager who trained at Starbucks, tells me that Starbucks makes their milk about 165F, with a kid's cup at 140F and extra hot at 170-175F. You can use any cooking thermometer (like a meat or candy thermometer) to monitor the temperature.

That's all a bit complex. I heat mine until I can see it steaming. In the microwave, heat 1 cup of milk a minute at a time until it's hot enough. On the stove top, use a metal pan and low heat so it doesn't scorch. When it's hot use a whisk (or even a fork) to whip it nice and frothy.

You can adjust the coffee and milk amounts until it suits you. Pour the hot frothy milk into the hot coffee and ta-dah! You've got a basic latte. (Trivia: A latte is about 1:3 coffee to milk with a little foam. A cappuccino is 1:1 coffee and milk with lots of stiff foam.)

Fancy Coffee
The reason we all go to Starbucks is for the indulgent fru-fru flavored coffees. Here's where it gets a little tougher on a budget, but it's not impossible. You can, of course, buy the coffee syrups fairly inexpensively (try your local warehouse store instead of a specialty shop). Whipped cream is cheap, buy a house brand in the spray can and it'll last almost forever in the fridge if you never let it sit out.

Vanilla Latte
2 teaspoons of vanilla extract
sugar to taste

You can also make your own syrup by flavoring simple syrup:

Vanilla Syrup
1 cup water
1 cup sugar
1 tablespoon vanilla extract

Stir the sugar into the boiling water until it's dissolved. Add the vanilla extract. Reduce heat and cook a bit to reduce it, stirring constantly. Cool and store in an air-tight container in the refrigerator. Add one or two ounces to a latte for flavor.

You can skim some calories on an eggnog latte by getting fat free eggnog. It won't be as thick, but the flavor is still there. Do not bring your eggnog to a boil, it will change the flavor.

Eggnog Latte
for the milk use:
1/2 cup eggnog
1/4 cup milk
Combine the eggnog and milk and heat.
Add coffee.
Top with whipped cream and a sprinkle of nutmeg if desired.

This is my absolute favorite. I need to get some more ginger!

Gingergread Latte
For this one you really need a syrup.

Gingerbread Syrup:
1 1/2 cups water
1 cup sugar
2 teaspoons ground ginger
1/4 teaspoon ground cinnamon
1/4 teaspoon vanilla extract

Combine the water, sugar, cinnamon, ginger, and vanilla in a small to medium saucepan. Medium is probably better since the syrup could boil over the top. Bring mixture to a boil then reduce heat and simmer uncovered for 20 minutes. When done, pour into a melt-proof container and let cool. It will thicken a bit more once cooled.

Add 2 ounces to your latte. Top with whipped cream and cinnamon, if desired.

Another favorite, and Starbucks always runs out way too early in the season.

Pumpkin Spice Latte #1
1 cup milk
1 tablespoon canned pumpkin
1 tablespoon sugar or sugar substitute - you can halve this amount
1 tablespoon vanilla extract
1 teaspoon pumpkin pie spice

For the steamed milk, combine milk, pumpkin and sugar and heat as noted above.
Top with whipped cream and sprinkle pumpkin pie spice, nutmeg, or cinnamon if desired.

Pumpkin Spice Latte #2
Make a pumpkin spice syrup.
1c sugar
1c water
2 tablespoons pumpkin spice
1 tablespoon vanilla extract

Stir the sugar into the boiling water until it's dissolved. Add the pumpkin spice and vanilla. Reduce heat and cook a bit to reduce it, stirring constantly. Cool and store in an air-tight container in the refrigerator.

Add one or two ounces to your latte. Top with whipped cream and sprinkle pumpkin pie spice, nutmeg, or cinnamon if desired.

This one's for Gnobrin, my favorite Starbucks addict:

Peppermint Mocha or White Chocolate Mocha
I tried this with peppermint candy and peppermint extract. It really needs a syrup too. Again, we just flavor simple syrup.

Peppermint Syrup
1 cup water
1 cup sugar
1 tablespoon peppermint extract

Stir the sugar into the boiling water until it's dissolved. Add the peppermint extract. Reduce heat and cook a bit to reduce it, stirring constantly. Cool and store in an air-tight container in the refrigerator.

To make a mocha, add chocolate or white chocolate syrup to your milk. You can also melt 3 tablespoons of chocolate or white chocolate chips in your milk. I like a delicate peppermint flavor, so I only add one ounce of syrup. Top with whipped cream.

If you want to get really really fancy, make peppermint whipped cream.

Peppermint Whipped Cream
1/2 cup heavy cream
2 tablespoons totally pulverized peppermints
1 tablespoon powdered sugar

Beat the cream, pulverized peppermints and sugar until stiff peaks form.

This one is just for Kiara.

Chai Latte
For this you need a Chai syrup concentrate. You guessed it, we're going to make simple syrup again! In this case it's not quite as sweet, it's more like the base for sweet tea.

Chai Tea Syrup
2 cups water
1 cup sugar
2-3 Chai Tea bags. I prefer Tazo, which is Starbuck's brand

Boil the water and add the sugar, stirring until it dissolves. Add the tea bags and turn off the heat. Let it steep until it's really strong, 15-20 minutes.

For sweetened Chai, add hot water to about 2 ounces of the syrup. For a Latte, add hot frothed milk.

A Note on Ounces, Shots, and Tablespoons

Those all seem to get bandied around a lot in coffee talk, don't they? It's pretty easy: there are two tablespoons in an ounce (by measure, not by weight). 4 tablespoons = 1/4 cup = 2 ounces.

A "shot" is a little vague; in coffee, my sister tells me, it can be an ounce to an ounce and a half depending on the coffee strength. If you're using a shot glass, be aware that they come in measurements from 3/4 of an ounce to 1 1/2 ounces. Get your tablespoons or measuring cup out if you want to know what size it really is.

Wednesday, October 07, 2009

Banana Bread

The kids love muffins. I love banana bread! Making a week of snacks for Junior's preschool class has me getting out all kinds of recipes, including this one. The original recipe is from my faithful 2nd edition Joy of Cooking. I took blue ribbons at the fair with it as a kid, and you can tell it's a favorite recipe because the cookbook opens right to it and there's batter splats on the page!

The trick to awesome banana flavor in banana bread is to really let the bananas go. They should be darn near black and not quite liquid. Not only does it crank the flavor up, but it adds tons of moisture. This recipe is naturally low-sugar and low-fat because of that.

If you're planning to make banana bread, watch at the grocery for mark-down bananas. Around here they run 20 to 30 cents a pound less, and you want them all mushy anyway.
Quick Banana Bread

1 3/4 cups sifted all-purpose flour
2 1/4 teaspoons double-acting baking powder
1/2 teaspoon salt
1/3 cups shortening
2/3 cups sugar
3/4 teaspoon grated lemon rind
2 eggs
1 1/3 cups ripe banana pulp

Optional additions:
1/2 cup chocolate chips
1/2 cup blueberries
1/2 cup chopped nuts

This works best if all ingredients are room temperature. Preheat oven to 350 degrees.

Sift together flour, baking powder and salt. In a separate bowl blend shortening, sugar, and lemon rind until creamy. Add eggs and banana to the sugar mixture.

Add the sifted ingredients in about three parts to the sugar mixture, beating the batter after each addition until smooth. Fold in any nuts or other goodies.

Place the batter in a greased bread pan and bake for one hour or until done. For muffins, bake 15-20 minutes. Makes one loaf or 12 muffins.

Usually with muffins or quick breads you want to mix them as little as possible or they get tough, but that's not true with this recipe, mix it very thoroughly. If the bread will last in your house, wait until it's completely cool before cutting - the steam escaping will make it go stale faster. That's not usually a problem around here.

For the kiddies I made blueberry banana muffins!

Sunday, August 16, 2009

Sweet Potato Pie

One of the commodities we've been getting in our TEFAP boxes is canned sweet potatoes. The problem is, my family doesn't like sweet potatoes one bit. Not as fries, mashed, candied, or with marshmallows on top. I firmly believe that if we're broke enough to be receiving TEFAP, we should not let any of it go to waste, so I set out to discover some way my family would eat them.

The answer was pretty obvious when I stumbled over it: pie.

There are lots of recipes for traditional sweet potato pie. As usual I'm looking for recipes that don't require I buy anything special. Pie crust ("short crust" to my friend Emily) is easy, I've always got that stuff and other basic baking needs. I found a lot of recipes that use sour cream or evaporated milk, which I don't keep around. The one I settled on uses buttermilk.

I keep buttermilk powder around when I can afford it, but you can make a buttermilk substitute by adding one tablespoon of vinegar to a scant cup of milk ("scant" means "not quite the whole measure" - just take a tablespoon of milk out before you add the vinegar.) This gives the properties of buttermilk for baking, and the taste is close. It will clump and look soured when you add the vinegar, which is what you want.

The recipes I found also use pie crust or graham cracker crust interchangeably. Graham cracker crust is really simple to make if you don't want to muck with rolling out dough. It's just crushed graham crackers and butter.

Graham Cracker Crust

6 Tbsp butter or margarine
About 24 graham crackers, crushed to make 1 1/2 cups of crumbs
1/4 cup sugar
Cinnamon, allspice, or nutmeg (optional)

Crush the graham crackers by putting them in sealable bag and rolling them until they're crumbs. A food processor or blender also works well.

In a small saucepan or the microwave, melt 6 tablespoons of butter. Measure 1 1/2 cups of graham cracker crumbs into a medium bowl. Add 1/4 cup of sugar to the graham crackers. Add the melted butter. Add a little cinnamon, nutmeg, or allspice to the crumbs for a spiced flavor. Stir or blend together with your hands. Press into the pie plate or other pan. To pre-bake the pie crust, bake for 8 to 10 minutes in a preheated 350 degree F. oven.

Most of the recipes I found used fresh baked and mashed sweet potatoes, and what I have are canned in syrup. They mash very well, and the syrup just means a sweeter pie. The recipe I started with is from bakingbites.com, and here's what I ended up with. If you're using buttermilk powder, follow the directions on the can for adding liquid and the powder:

Buttermilk Sweet Potato Pie

1 15 ounce can of sweet potatoes, drained
1 cup buttermilk
1/4 tsp nutmeg
1/4 tsp salt
2 tsp vanilla extract
3/4 cup brown sugar
3 large eggs
2 Tbsp flour
1 9 or 10 inch pre-baked pie crust

Preheat oven to 350 F.

In a blender or food processor, blend the sweet potatoes and buttermilk to a smooth puree. Add all ingredients except flour and blend smooth. Add flour and pulse the blender until it's just incorporated (don't over blend, it will make the pie tough).

Place the pie crust on a baking sheet and place baking sheet on the middle rack of a preheated oven. Pour filling into pie crust (it is thin enough that it will slosh if you put it in the pie crust and attempt to carry it over to the oven).

Bake for 50-55 minutes, until pie is set and jiggles only very slightly when the pan is bumped. You may want to put a crust guard (foil works) on the exposed pie crust to keep it from burning.

Cool on a wire rack to room temperature. Refrigerate for at least 2 hours, or overnight, before serving.

This is close enough to pumpkin pie that the kids don't notice the difference! A little whipped cream dresses it up.


For the pie pictured here I used a Wal-Mart "Great Value" pre-fab pie crust. I won't be buying that particular crust again. The first shrank up so bad on baking that what I had was a thick tart crust with barely any sides. So I rolled out the second crust a bit and left it laid over the edges of the pie pan for shrinkage, and it didn't shrink. It did, however, bubble up badly on baking (despite pricking it), which has left some shallow spots in the pie.

The good news is the kids don't care too much, they just like pie. And there's nothing wrong here that sufficient application of whipped cream won't fix.

UPDATE:
I made this pie today and remembered to take a picture of a pretty one. I've also tweaked the recipe a little.

The pie won't stay puffy, by the way. Custard pies will "fall" as they cool.

Sunday, May 17, 2009

Apple Tartlets

Kiddo had been bugging me for apple pie. I'm not a big apple pie fan - no reason, it's just not on my favorite pies list - and since money's tight I like to make desserts special to offset the parade of casseroles we have for dinner. I decided to make some little apple tartlets.

Most of the tartlet recipes I found involved using puff pastry wrapped around apple slices seasoned like apple pie. I actually wanted little pies, though, so I improvised. There's two ways to go about this: assemble the tarts and bake, like an apple pie, or pre-cook everything and assemble them. I went for Option B because I could break the preparations up around chasing kids and making dinner.

I used store-bought pie crust ('cause I'm lazy). I found that a particular piece of plastic storage ware made a circle just right for tucking into muffin tins. I got ten circles out of the two crusts, and could have gotten 12 had I felt like re-rolling the dough remnants. I hindsight I might roll the crust little thinner than it is right out of the package.


I baked then for the shortest time listed on the package, I think it was 9 minutes. Let them cool and they come out of the muffin tins very easily. I was distressed that some of the shell walls seemed to have collapsed, but in the end that didn't matter one bit.


Since I was assembling my tarts instead of baking them, I looked for a sauteed apples recipe.
Sauteed Apples
  • 3 Granny Smith Apples (peeled, cored, sliced)
  • 4 Tbsp Butter
  • 3/4 Cup Packed Brown Sugar
  • 1.5 Tbsp Cinnamon
  • 8 oz Apple Juice
Combine apple juice and 1 Tbsp cinnamon in a deep bowl. Place apple slices in bowl with juice and soak 30 minutes. Melt butter in large skillet, add brown sugar and .5 Tbsp cinnamon and stir til melted. Add apple slices and juice, and heat to a boil (on High). Cover and boil, on High for 10 minutes. Remove cover and reduce heat, simmer for 5 minutes. Apples will soften and syrup will form. Remove from heat and transfer to serving bowl.
I used Gala apples instead and reduced the brown sugar to 1/2 cup. This resulted in a thinner syrup, but I don't think it hurt anything.

I let it cool so no one would burn their tongue (sugar syrups get very hot), and filled my shells. There was just enough to fill the 10 shells very nicely, so I didn't feel bad about throwing away the dough remnants instead of re-rolling them.

These were done just before dinner, and were still a little warm when I garnished them and served them. You could sprinkle a little cinnamon on the whipped cream if you like.


It occurs to me that you could make little pudding pies like this, or almost any kind of pie that you put into a pre-baked crust. I'm not sure you could bake the pies long enough to set a cooked pie without burning the little crusts, but I'd have to try.

Saturday, May 09, 2009

Salmon, yum!

So unlike many Alaskans we don't get to go fishing during salmon season or have friends with a fish wheel to fill our freezer. So when Fred Meyer had a one store, two days only sale on Sockeye Salmon ($2.99 a pound!) I jumped on it.

Cooking a whole salmon is really, really easy. I assume it's been beheaded and properly cleaned.

Roasted Salmon

1 whole sockeye salmon, cleaned (3-4 pound)
1 large lemon, sliced
fresh dill
1/4 c butter
1/2 c white wine (optional)
salt and pepper to taste
Big sheets of aluminum foil

1. Heat the oven to 375F.
2. Piece together the foil to make a sheet big enough to wrap the salmon in a big foil packet.
3. Put the lemon slices and chopped dill into the body cavity with dots of butter. Fold the edges of the foil together but just before sealing, pour in the wine.
4. Bake the fish for 50-60 minutes.
5. Serve hot or cold. If you want to serve it cold, allow the fish to cool in the parcel and then gently peel off the skin.

Other things that go good in a salmon cavity: pineapple (or any acidic fruit), bay leaves, tarragon, apricots, or whatever your mom used to use! The drippings can be poured over rice. Salmon is full of natural Omega-3's; the acids help draw that from the fat under the skin into the flesh.

Leftovers, if you have any, make a lovely sandwich spread, just add some mayo like tuna salad.

Monday, April 27, 2009

Busy Busy!

Yeah, that's always my excuse, isn't it? Work's been very busy lately, and since I work online from home, it tends to eat every spare minute I have. See, last week we launched the complete re-do of the EQII ZAM site. Never mind the details, but for the month before that we were pretty much burried in the beta of that site. I'm very pleased with it.

The very next day my boss calls me up and offers me the Senior Content Manager position for our Free Realms site. In addition to my EQII job! Free Realms launches tomorrow, so I went from crunch time right into crunch time. It's a daunting project, but I've got a fantastic team and I'm more tired than stressed.

Needless to say that leaves very little time for blogging or doing anything interesting in the kitchen. But I do have a fast recipe to share.

Kiddo can't have any Red 40 (a USDA approved food color that's been banned in Great Britain and many European nations) because it aggravates his ADHD symptoms. This is a serious bummer, as it takes odd things out of his diet. The other day I was getting all cheesed because he can't have red Jell-o, just yukky flavors like lime. All but a couple flavors of Jell-o have Red 40 in them.

So I got on the net and figured out how to make my own "gelatin desert".

Not Jell-o

It's not Jell-o because that's a trademarked name. But your kids won't know and this is healthier, no added sugar! Be warned, this makes a HUGE bowl.

3 envelopes gelatin (like Knox)
1/2 c cold water
2 c boiling water
2 c cold water or fruit juice
1 12-oz can frozen juice concentrate
4 c fruit - pears, peaches, bananas, etc.

In a 3-quart mixing bowl, soften gelatin in 1/2 c cold water. Pour boiling water over gelatin. Stir until completely dissolved.

Add cold water or juice and frozen concentrate. Add fruit. Let set in refrigerator until firm.

I thawed the frozen juice in the fridge so it was pourable but cold. Like Jell-o, you may want to let it soft-set before you stir in the fruit. The flavor was strong enough that you probably don't need the two cups of cold to be juice.

Easy!

Sunday, April 12, 2009

Happy Easter!

Whether you believe in the Resurrection of Christ, pagan spring fertility rites, or just dig chocolate bunnies, I wish you a Happy Easter!

I managed to do pretty good cheap Easter baskets for the kids. I started about six weeks ago, combing the dollar bins at Michael's and prowling the Wal-Mart aisles. They ended up with cute little notebooks, sticky notes in the shape of their initials, little wind-up toys, candy corn with no artificial dyes, and pastel colored "chocolate" rabbits. I spent maybe 20 dollars on the whole thing, including egg dyes, baskets and grass. I would have loved to get more elaborate, but since they sat there playing with the stuff for over an hour, it's a success.

Easter has foiled my plans for blogging deboning chicken for later use (again), as Sam's Club is closed today. Safeway's less popular chicken parts are $2.39 a pound. No way. I did get a whole chicken at Wal-Mart, though, to roast and do the stock thing with again. See, we keep finding inexpensive chopped ham (five pounds for $4.99 today at Safeway), but we've been eating it almost exclusively for about six weeks. Now, to quote someone who's name I've forgotten, "Oatmeal every day is better than no oatmeal at all," but dang, I'm heartily tired of chopped ham. Chicken and rice was a nice change, even if I ate it five days in a row.

I found a new cheap recipe to put into the casserole recipe rotation. We haven't tried it yet; I'm making it tonight. This is courtesy of Baby Center: a Savory Bread Pudding. I hear bread pudding and think dessert (yum!), but we forget that a pudding is also a baked custard-y thing of almost any variety. Ask the British! This also bears a strong resemblance to the Stove Top Brunch Bake. In cooking, very generally speaking, you can think of "savory" as the opposite of a sweet, often rich and usually spicy. Webster's says "pungently flavorful without sweetness".

Savory Bread Pudding

Ingredients:
2 tablespoons butter or olive oil
4 slices bread, cut in half
1 small onion, finely chopped
1 cup broccoli, cut into small pieces
1 zucchini, cut into cubes
1 cup cooked chicken, turkey, beef or ham, cut into cubes
Salt and pepper
2 eggs
1 cup milk
1 cup grated hard cheese

Preparations:
Use 1 tablespoon butter or oil to grease the bottom of a large ovenproof skillet or baking dish. Place the bread slices so that they cover the entire bottom of the skillet or dish. Heat the remaining tablespoon of butter or oil in a skillet over moderate heat. Add the onion and cook 4 minutes. Add the broccoli and zucchini and cook 5 minutes, stirring frequently. Add the meat and cook 2 minutes. Remove from the heat and season with salt and pepper. Spread the cooked vegetables and meat on top of the bread slices. In a bowl, beat the eggs with the milk and half the cheese. Season with salt and pepper. Pour the egg mixture on top of the bread and sprinkle with the remaining cheese. Cover with foil and bake 20 minutes. Remove the foil and bake another 5 to 10 minutes, or until the cheese is bubbling and the eggs are cooked. Serve hot or at room temperature. (Makes 4 servings)

Variations:
This is a great way to use up leftover, somewhat "stale" bread. You can omit the meat and make this a vegetarian dish.

Bread never gets stale here, but I bought some day-old rolls at Wal-Mart ($1.50 for a dozen good-sized rolls), and used 2 1/2 of them to line a 9 x 13 baking dish (I sliced them like bruschetta). Zucchini is not a fav here, but I bought one broccoli head and a yellow onion. The meat, I have (shudder) cubed chopped ham. 4 servings won't be enough, so I'm going to increase the eggs to three and add an extra 1/2 cup of milk. The result should be somewhere between a bread pudding and a quiche. And most importantly, won't involve rice, pasta, or Cream of Celery soup. Just chopped ham....

Tuesday, January 27, 2009

Peanut Butter Cookies

Who needs pre-fab, nasty, recalled peanut butter crackers? Some recipes are timeless, and is wasn't until a friend of mine, who is making tons of them for his wedding reception (any day now, tick tick tick!), that I even thought of them. Right now the house smells just delicious, so I thought I'd share.

This recipe is straight out of my treasured second edition Joy of Cooking. Which, of course, I can't find a copy of anywhere to link. I did find this facsimile edition of the original Joy of Cooking, though!
Peanut Butter Cookies
1/2 c butter or shortening
1/2 c firmly packed brown sugar
1/2 c granulated sugar
1 egg
1 cup peanut butter
1/2 tsp salt
1/2 tsp baking soda
1 tsp vanilla
1 to 1 1/2c flour

Preheat oven to 375F. Beat the butter until soft. Gradually add both sugars and blend until creamy. Beat in all remaining ingredients except flour. Add flour, using the larger amount if your peanut butter is oily.

Roll the dough into small balls. Place them on a greased cookie sheet and press flat with a fork dipped in flour, making a criss-cross pattern. Base for 10 to 12 minutes.
Margarine works fine, and I prefer the flavor with butter or margarine. I wisk all the dry ingredients together first. But it's that easy.


Saturday, January 24, 2009

Parmesan Meatballs

Ages ago I had this really great recipe for Parmesan Meatballs. I've no idea what happened to it, but since I got a great deal on burger at Safeway, I decided to give it a go. There seem to be two basic variations on meatballs: an Italian type for pasta and tomato sauce, and a Swedish type for gravy or cream sauce. In my opinion, this meatball came out pretty all purpose.

I started with these two recipes for reference: Parmesan Meatballs (Cooks.com) and Easy Baked Parmesan Meatballs (kraftfoods.com). Here's what I ended up with:
Parmesan Meatballs

2 pounds ground beef
1/2c oatmeal
1c grated Parmesan Cheese
2 tbsp Italian Seasoning
2 tbsp garlic powder
1 tbsp onion powder
2 eggs
1/2 cup milk

Preheat oven to 375F. Line two baking sheets with parchment paper or foil. Combine all ingredients well (hands work best) . Form the mixture into 1 1/2 inch balls and place on the baking sheets so they're not touching. Bake for 25 minutes or until cooked through. Makes 50-60 meatballs.
I took half of these and froze them for later. The rest I put in an airtight container until the spaghetti sauce was hot, then added the meatball to the sauce for about 5 minutes to get them warm. This made 5-6 meatballs for everyone, and was a huge hit. You could easily make a Swedish meatball sauce and serve them over rice or noodles, or heat them in barbecue sauce and serve them with toothpicks.

It's a very forgiving recipe. You could, of course, adjust the seasonings to taste. A dash of salt and pepper to taste wouldn't hurt either. I used "canned" grated Parmesan, as we buy that in the giant size from Sam's, but I have to mention that fresh grated "real" Parmesan will give you superior flavor. With my old recipe I also used to use half Italian sasuage, which is very tasty.

The oatmeal - well, the purpose of filler in a ground beef recipe (besides stretching it a bit) is to soak up juices and make the result less dry. I remembered that my old recipe had a tendency to crack, and one of my references suggested soft bread crumbs (made from fresh bread instead of dried bread). I tend to use oatmeal because I've got it but don't use it much. You never see it in the end result. Italian bread crumbs would probably work well.

What I like best, though, is these are very freezable. One day I'll be at a loss for dinner, and there in the freezer will be meatballs, just waiting!

Wednesday, January 21, 2009

Good Stuff

I suppose "reblogging" is like regifting. Scorned publicly, but everyone does it sometime. My turn! Here's a couple of 'net nuggets I've found.

First, to make up for the severe lack of recipes, here's a wonderful article from our local paper on easy breads with minimal kneading. No excuses: Homemade bread is still worthwhile This caught my eye because my tendinitis has pretty much stopped my bread kneading and I can't afford that KitchenAid mixer yet (and haven't the room for it!).

The next Hubby found. It's a travel piece, Alaska in Winter: See the Northern Lights, from MSN travel. You hear a lot on winter in Alaska, but let's admit it, me complaining about the temperatures doesn't exactly show Alaska's good side. This is a very well done piece and I highly recommend it.

Lastly, something in the humorous-political-gamer-geek department (that's what, four of us??), from missdoomcookie over at SOE. Patch notes. US Democracy Server: Patch Day (version 44.0).

Thursday, June 05, 2008

Meatloaf

Meatloaf. An American classic. How to make ground beef into a non-sandwich entree.

If you can get a good price on ground beef meatloaf is a great option. But why not mix it up a little? I have several meatloaf recipes I use to keep some variety going.

Basic meatloaf is simple. Meat, a binder to keep it from falling apart, a filler to help hold those tasty juice flavors in, and seasonings. The correct method for making a meatloaf is to dump all the ingredients in a BIG bowl and use both hands to mix it up. When cooking it, you're going for an internal temperature of 160 to 165 degrees. Two pounds of ground beef will make a meatloaf big enough for my family with leftovers for sandwiches.

I never measure for meatloaf, but my basic recipe goes something like this:
Basic Meatloaf
  • 1 pounds ground beef
  • 1/2 cup oatmeal
  • 1 egg
  • 1 tablespoon garlic powder
  • 2 teaspoons onion powder
  • 1 tablespoon parsley
  • 1 tablespoon Worcestershire sauce
I find it cooks faster flat than in a loaf shape, so I use a round cake pan and cook it at 400 degrees for about an hour. Drain off the juices. My loaf shaped meatloaf pan with the neeto rack to let the fat drain off will take almost two hours and I'll cook it at a lower temperature, 350 degrees, to keep it from burning.

Auntie's Variation: Add frozen mixed veggies to the meatloaf!
I feel the need to mention that a lot of "traditional" meatloaf recipes use catsup. I don't care for catsup or tomato sauce in my meatloaf, although I'm not opposed to it being used as a condiment. I've also seen milk and cracker crumbs in meatloaf recipes. However your mom made it is just fine!

This next recipe is what I remember of a meatloaf my ex and I had at a hotel once. The grated veggies add a really fresh flavor and juiciness.
Garden Meatloaf
  • 2 pounds ground beef
  • 1 large carrot grated fine
  • 2 large celery stalks grated fine (discard the stringy bits)
  • 1/4 cup grated or fine-chopped onion
  • 1/2 cup oatmeal or breadcrumbs
  • 1 egg
Bake as above.
When Nana watched the kids last fall we found this one in the fridge when we got back. Or at least, this is my best guess! For months after Nan was here Kiddo always wanted cheese on his meatloaf!
Nana's Meatloaf:
  • 2 pounds ground beef
  • 1 1/2 cups dried stuffing cubes (you could use Stove Top or another mix for the seasonings, what I found in my pantry was plain stuffing cubes)
  • 1 can sliced mushrooms
  • 1 egg
  • 2-3 slices American Cheese
Save the cheese - about 5 minutes before you take the meatloaf out put the cheese slices on top and get them all melty.
Now some fun ones!
Corn Stuffed Meatloaf
  • 1 1/2 pounds lean ground beef
  • 3/4 teaspoon salt
  • 1/4 teaspoon black pepper
  • 1/2 teaspoon chili powder
  • Stuffing Mixture:
  • 1 1/2 cups whole kernel corn, canned or frozen, thawed
  • 1 cup soft bread crumbs
  • 1/3 cup finely chopped onion
  • 1 tablespoon dried parsley flakes
  • 1 egg, slightly beaten
  • 1/2 teaspoon salt
  • 1/4 teaspoon pepper
Combine ground beef, salt, pepper, and chili powder. On a large piece of wax paper or foil, form beef mixture into a 10- x 12-inch rectangle.

Mix stuffing ingredients. Top meat with stuffing mixture to within 3/4-inch of edges and roll up like a jelly roll. Seal ends to keep corn mixture in. Place roll in a baking dish (with sides). Bake meatloaf at 350° for about 1 hour to 1 hour and 15 minutes.

Note: Soft bread crumbs means "not toasted or dried". Run a couple slices of bread through a blender. I let them sit out for an hour or so so they crumb better.
This is the recipe that actually inspired me to make this meatloaf blog:
Meatloaf Pie

1 pound extra-lean ground beef
1/2 cup bread crumbs
1/3 cup catsup
3/4 tsp salt
1 cup frozen mixed vegetables
1 3/4 cups water
1/4 tsp garlic powder
1/4 tsp onion powder
3/4 cup milk
2 dry mashed potato mix

Heat oven to 375°F. In medium bowl, mix beef, bread crumbs, ketchup and 1/2 teaspoon of the salt. Press mixture in bottom and up sides of ungreased 9-inch pie pan. Bake 10 minutes.

Meanwhile, in 2-quart saucepan, mix frozen mixed vegetables, water, remaining 1/4 teaspoon salt, garlic powder and onion powder. Heat to boiling. Remove from heat. With fork, stir in milk and mashed potato mix (dry) until potatoes are of desired consistency.

Remove beef crust from oven; pour off any drippings. Spoon potato mixture evenly into partially baked crust. Bake 10 to 15 minutes longer or until hot.

Saturday, April 19, 2008

Let them eat cake!

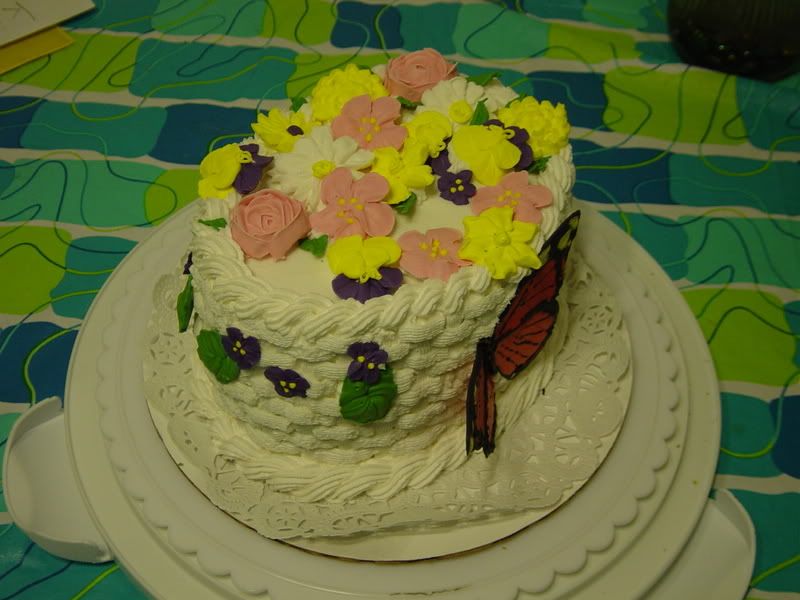
The last couple of months I've been taking Wilton cake decorating courses at JoAnn's. Cake decorating is has been on my "That'd be neat to learn" list for a long time. These classes were short and taught in classic hands-on Alaskan style by a lovely woman named Joyce, who has been decorating cakes for 40 years.

If you get a chance to take one of these classes you should, it's fun! I had an absolute blast and the family has been quite cooperative about eating my homework. Be warned that while the class fees are cheap, you can get sucked in buying materials. Required materials aren't terribly expensive, but if you get into it you want to get lots more (join JoAnn's mailing list for coupons)!

Things I learned: grocery store canned icing is no good for decorating, it's just too soft. You need buttercream icing, also called wedding cake icing. And those candy cake decorations you buy in the cake mix aisle? They're made from royal icing! Royal icing, by the way, can single-handedly kill an electric hand mixer. When I finally get a good-sized kitchen, and big Kitchen-Aid style counter mixer is on my list.

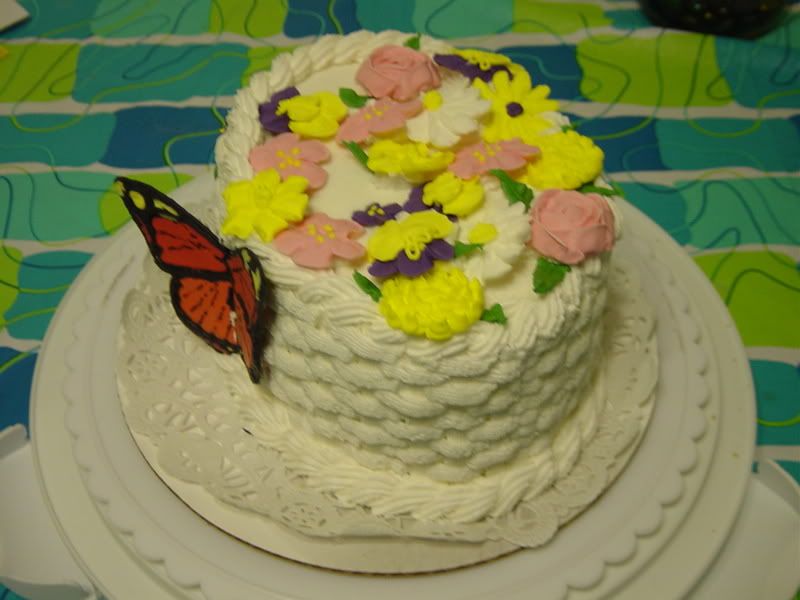
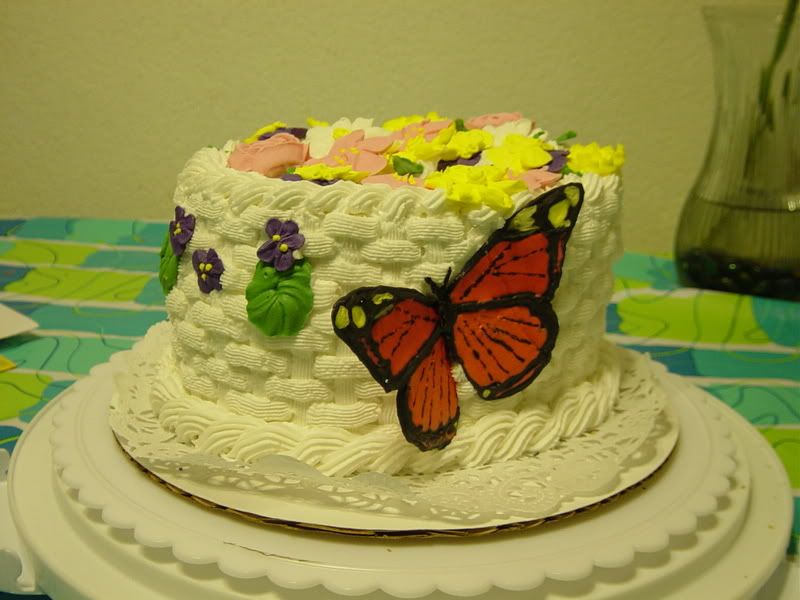
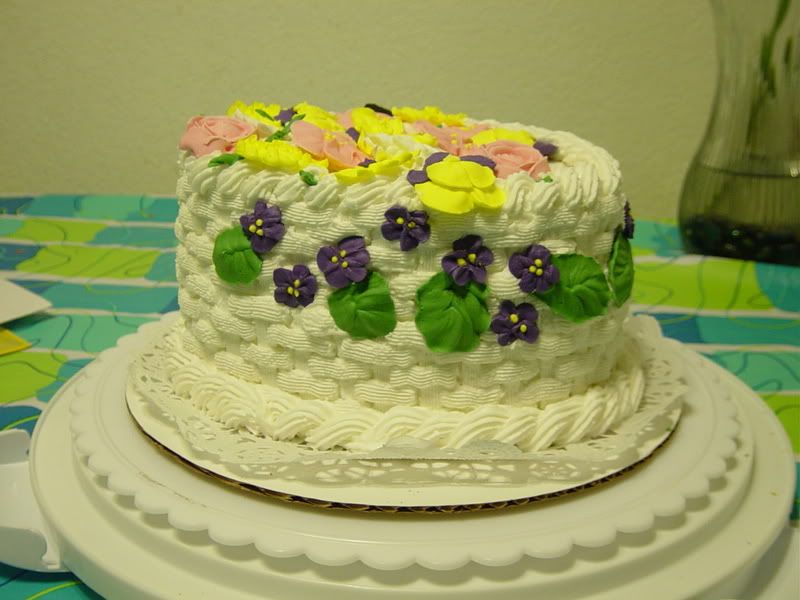
Anyway, I though I'd share my final project. The flowers and butterfly are "candy":


Tuesday, April 08, 2008

Losing your Noodle?

A friend left a comment asking for my tuna casserole recipe, so I thought I'd blog casseroles.

Casseroles are one of those dishes that can stretch your food budget and fill your family up. The challenge is finding a formula you like and having enough variety that no one cringes when you put it on the table.

Here's my basic casserole recipe:

All-Purpose Noodle Casserole Formula

1 to 1 1/2 cups of cooked meat, bite sized (smaller is better)
half a bag of egg noodles, cooked to package directions and drained
1 to 1/2 cups veggies (frozen is fine)
1 can of cream of something soup
1/2 to 3/4 of a soup can of milk
seasonings

Mix everything well in a large casserole dish and cooked covered for 30-60 minutes at 350 degrees. (Less than 30 minutes it may not be hot through; more than an hour and it may dry out.)

The way noodle casserole can stretch your budget is saving you meat. One chicken breast might be a serving for one person, but chopped into a casserole it'll serve four. Remember, you need less protein every day than you might think! You can also add more veggies or noodles if you want to stretch it. Remember that the more stuff you have in there the more milk you'll need to add; you want it saucy, not soupy or dry.

Seasonings are anything you'd think would go well. Try thyme with pork, ginger with chicken, Italian seasoning with almost anything.

Basically the whole recipe is mix-and-match. Here's some examples:

Ham and Broccoli Noodle Casserole

1 to 1/2 cups chopped leftover ham
half a bag of egg noodles, cooked to package directions and drained
1 to 1/2 cups chopped broccoli
1 can cream of cheddar or cream of broccoli soup
1/2 to 3/4 soup can of milk

shredded cheese (optional)

Variation: omit the noodles and top with mashed potatoes like a shepherd's pie. Uncover 5-10 minutes before it's done to brown the potatoes.


Not Hamburger Helper Casserole

1 pound ground beef, browned and drained
half a bag of egg noodles, cooked to package directions and drained
1 to 1/2 cups mixed veggies
1 small can mushrooms pieces
1 can of cream of celery soup
1/2 to 3/4 of a soup can of milk
1 tablespoon brown gravy mix

I keep a large container of Tone's brown gravy mix (get it at Sam's Club) in the pantry. Stir a tablespoon or two into the milk when using beef and your casserole will taste less bland.

Almost Green Bean Casserole

1 cup diced leftover chicken
half a bag of egg noodles, cooked to package directions and drained
1 can french-cut green beans
1 small can mushrooms pieces
1 can of cream of mushroom soup
1/2 to 3/4 of a soup can of milk
French-Fried Onions

Stir some french-fried onions into the casserole, and use the rest to top the casserole (put them on 5 minutes before you take it out of the oven).

Chicken Noodle Casserole

1 to 1 1/2 cups chopped cooked chicken
1/2 bag of egg noodles, cooked according to package directions
1 can cream of celery soup
1/2-3/4 soup can of milk
1 cup mixed frozen vegetables
1 teaspoon chicken bullion

Add the bullion to the milk to avoid a bland casserole.

Oh, goodness, I almost forgot the Tuna Casserole!!

Tuna Casserole

1 can of tuna, well drained
1/2 bag of egg noodles, cooked according to package directions
1 can cream of celery soup
1/2-3/4 soup can of milk
1 cup mixed frozen vegetables
Related Posts with Thumbnails